
There are a million-and-one ways to add creative flares and effects to your shots in post-production after you’ve taken the image, but nothing beats the look and feel of an image that has used in-camera flares and bokeh effects.
The reason for this is simple; light reflects and refracts what’s around it, and if you’re adding someone else’s lens effects into your shots in post, it’ll always look foreign and out of place. Compare adding those foreground flare effects in Photoshop with actually shooting with foreground elements between you and the subject during the shoot, and the final image will always feel more natural and believable.
The best part about all of this is that it’s super simple to do. The technique requires very little skill to achieve and it’s also very cheap to implement. Plus, these great-looking and totally unique images won’t require you to use somebody else’s lighting effects that may have been used by many other photographers too.
For this technique to work, all you really need is to place something between you and the subject you are photographing. A lot of the time this could be environmental elements like leaves or windows, but if you want to take a little more control of the effect, why not try handheld objects like glassware or crystals?
By placing these elements in front of the lens and shooting at a wide aperture like f/2.8 for example, you’ll get these beautifully soft and out of focus elements in the foreground of your image.
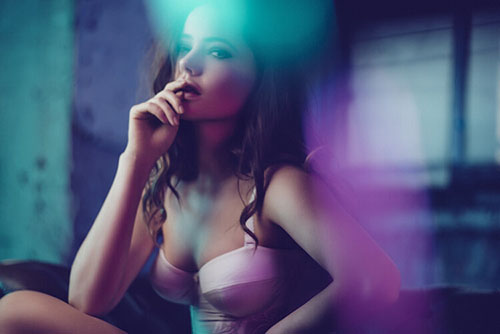
Simply holding a wineglass in front of your lens will allow for light to catch it and produce a sense of depth. Hold crystals in front of your lens and you may even get the addition of rainbow colors in there too. The purpose of this technique is to add believable drama and atmosphere to your shot without the need for awkward and often unbelievable post-production effects.
In-Camera Foreground Elements
The purpose of many images is to create a sense of depth to them. This technique allows you to take control of that depth by adding your own foreground elements.
What You Will Need
This is a fairly simple setup and one that can be achieved with very little gear and very little space. In fact, this setup can easily be done in most small rooms at home.
- 2 lights
- 2 stands
- A Venetian blind (can be purchased for around $20)
- 1 large softbox
- 1 open dish reflector (a barn doors is a bonus, but not mandatory)
- A fairly fast lens is also recommended. By fast lens, I mean one that has an aperture of around f/2.8. This wider aperture will ensure we through those foreground elements out of focus and they don’t become distracting in shot.
- Plus you’ll obviously need a selection of shiny things. Try some glassware first and then move onto more creative items later.
The Shoot
Adding a Window
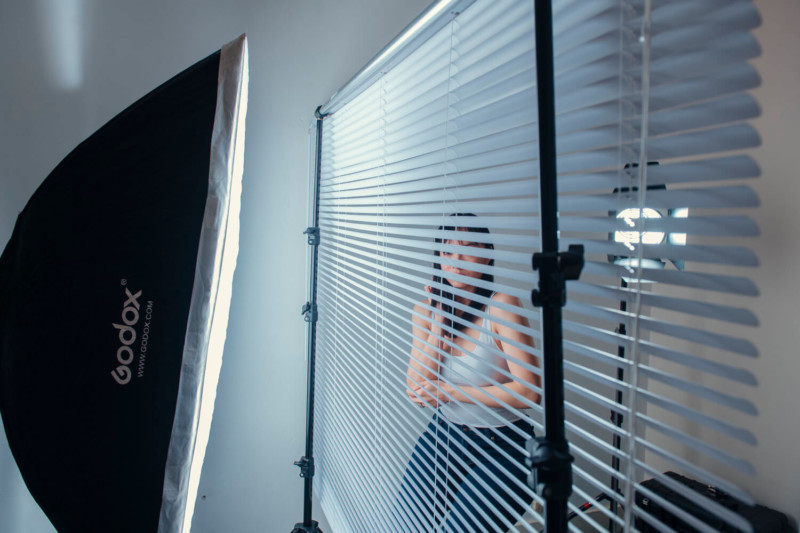
For this setup, we want to create a believable room scene in a studio environment. I wanted to create a strong directional light to one side that was supposed to emulate window light. I couldn’t add a window to the studio, so I did the next best thing by adding a Venetian window blind in front of a softbox. This cleverly tricks the viewer’s eye into assuming there is a window behind it when in fact it’s just a large softbox.
The Key Light
The main light in this shot is, in fact, a large softbox placed behind a Venetian blind to emulate sunlight coming through a window. You could use a couple of smaller softboxes back there too and you should also consider placing a white sheet between the softbox and the blind to soften the light even further. This ensures there are no gaps in the light, especially if you’re using multiple softboxes.
The ‘Foreground’ Light
Although we set this light up behind the subject, the core function of this bare reflector light is to light the glassware in front of our lens. For this light, I’m just using an open reflector dish with some barn doors to control the spread of it if needed. This is then placed high-up on a stand so it can be pointed down to catch on the reflective surfaces of the glassware in front of our lens.
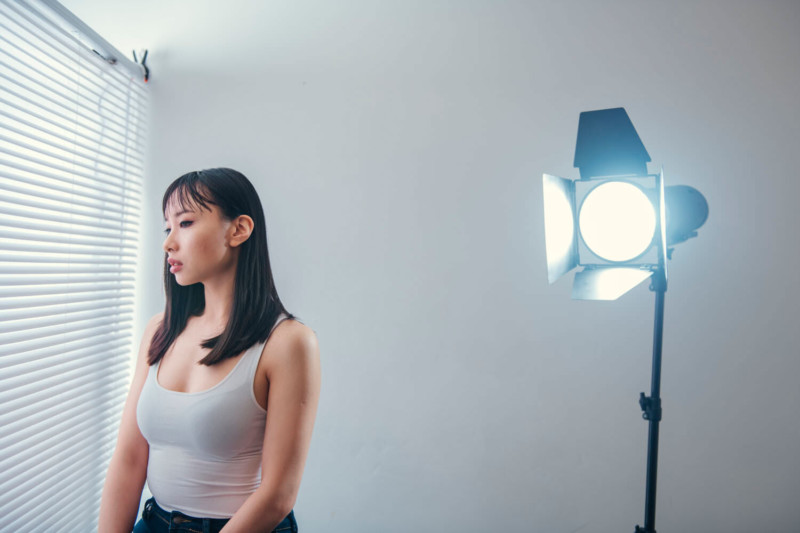
The trick to this setup is to light our foreground elements. We’ll be holding glassware in front of our lens, but if no light falls on it, it won’t sparkle or shine and will immediately look out of place. This light placed behind the model and pointed back towards the camera is actually there to light the glasses we’ll be holding.
Note: If you have enough space, you can put this light further back and get it to light the side of the model too. This effectively becomes our hair light and the foreground light.
Model Position
Our window blind is pressed up against the wall, so we want our subject to be nice and close to the wall as well to ensure a bright and airy feel to the lighting. The model here is probably only a couple of feet away from the back wall and very close to the blind itself.
As our main light is behind our window blind, we’ll want our model facing into that blind as much as possible to ensure the most flattering light too.
Tip: Get the model to look into the blind and expose her first prior to turning on the backlight.
Holding the Glassware
The final thing that ties this whole setup together will be the glassware in front of the lens. This is the really creative part of the setup as even small movements of the glassware can create significant changes in the final image.
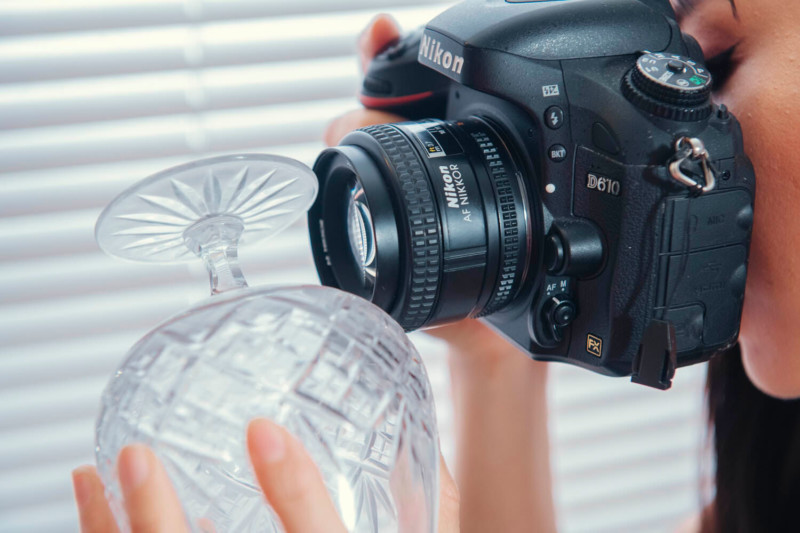
You can, of course, hold whatever you want in front of your lens, but I do prefer just a simple glass that has some cut-glass features on its surface. Like I mentioned earlier, this technique can work with just about anything. If it’s shiny enough to catch reflections in the light, don’t be afraid to try it in front of your lens. Crystals, bare metals, beads, cutlery, cellophane… the list of items to try is endless. Couple that with the fact that you can introduce colored elements in the foreground too and the possibilities are vast.
Once you have your desired shiny object at the ready, prepare to take a lot of shots to experiment with what works. As long as the light behind the model is pointing straight to camera, your object should be catching the light perfectly and if you’re ensuring that you’re shooting with a wider aperture, you should be getting those beautiful, big flared highlights in your shot with ease.
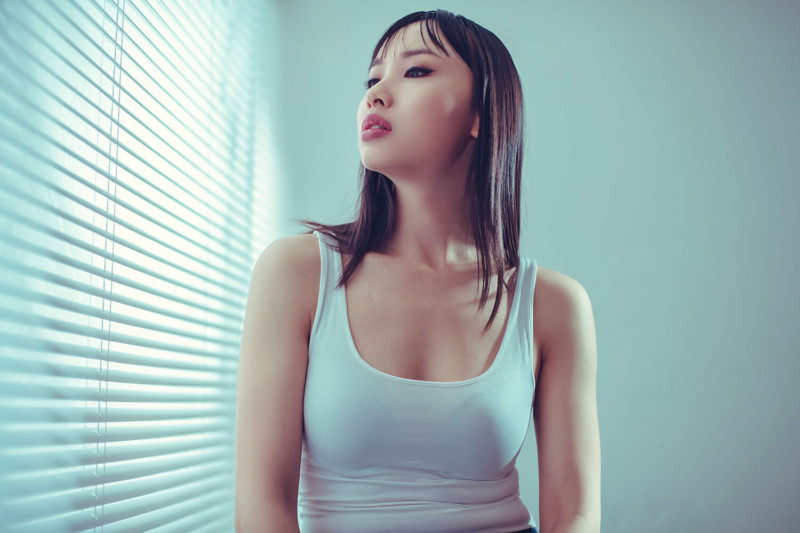
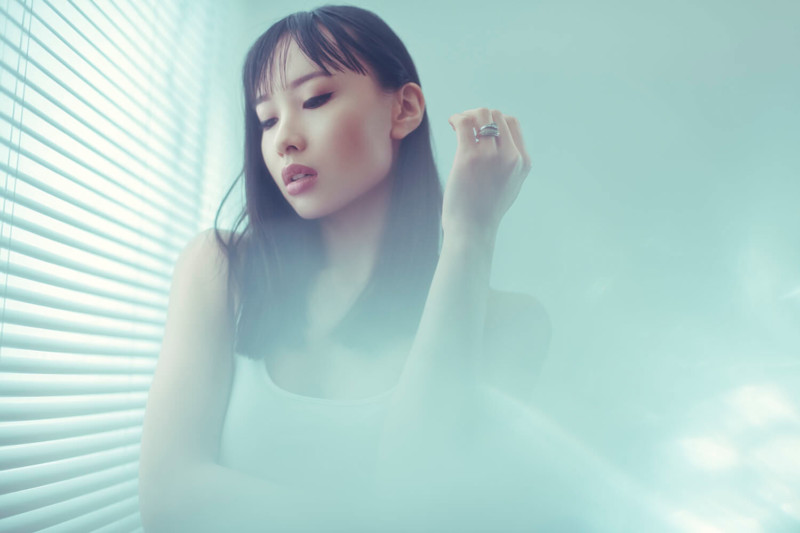
Final Image
Provided you’ve set everything up appropriately, your final shot should be looking something like this…
Points to Remember
Flattering light. This large softbox creates a very soft and flattering light that is very easy to work with. Plus this is what a window light looks like so it helps ‘sell’ the look in a studio environment.
Model to background separation. By purposefully not lighting the white background behind our subject, we create a visual separation between the foreground and background. If it was too bright back there, it would be distracting.
Controlling light spill. There is a light behind our subject, but you can see that it isn’t falling on her, but only onto the glassware in front of the lens. This is personal preference and I’ve chosen this here so as to not confuse the viewer with multiple light directions. It’s certainly worth considering more spill as an option though.
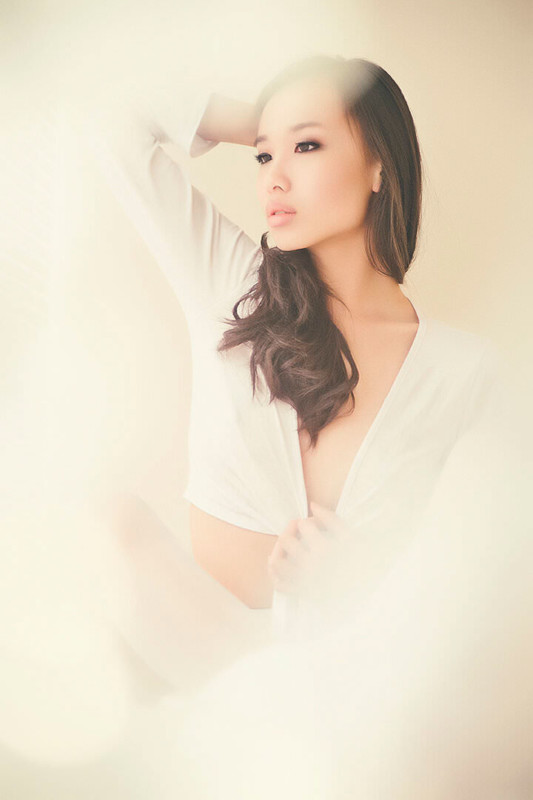
Foreground elements. The foreground elements here don’t look out of place, and their soft glow matches the already very soft light in the image. This is the sweet-spot for me personally. If those foreground elements become too dominant or bright in the shot, they start to be too distracting.

Why Be Creative?
This is a super-simple setup that requires very little in terms of space and equipment. But why bother with the foreground flare at all, why not just shoot the scene without anything in front of the lens?
This is of course totally up to you and you have a perfectly useable lighting setup without the foreground flare, but I’d possibly ask the same question back to you, ‘why not add that extra element and depth?’
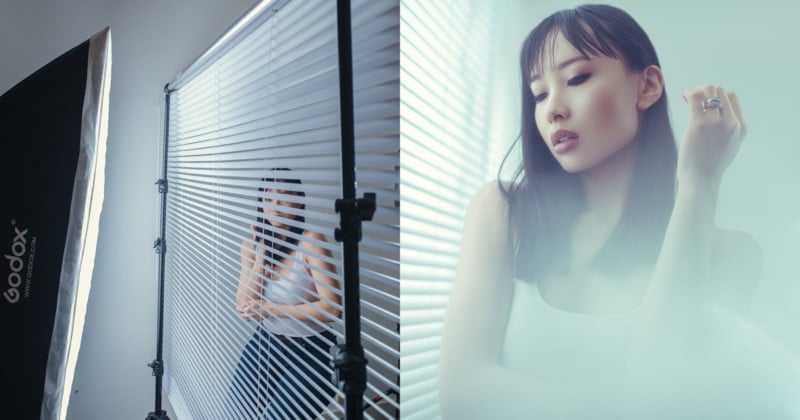
Take a look at the two shots below and ask yourself which you prefer. The one with the foreground flare? Or the one without it?
Of course, ultimately it’s up to you, but for me, the difference is very clear. The one with the flare has an awful lot more atmosphere and is far more visually engaging to look at. For me, that is what photography is really about.
P.S. Be sure to download my brand new 50-page studio lighting book here.
About the author: Jake Hicks is an editorial and fashion photographer based in Reading, UK. He specializes in keeping the skill in the camera and not just on the screen. If you’d like to learn more about his incredibly popular gelled lighting and post-pro techniques, visit this link for more info. You can find more of his work and writing on his website, Facebook, 500px, Instagram, Twitter, and Flickr. This article was also published here.
Image credits: Modeling by Jaye


