

I love a photography challenge and there’s nothing more challenging than shooting a church wedding ceremony. Forget everything else that happens during the course of a wedding day, the ceremony is the grand occasion. The awesome moments that your couple have been waiting for happen here, so you need to be ready.
You do not want to be the photographer that missed moments because in the run-up you either (a) failed to plan well and communicate clearly with your couple or (b) got flustered with your camera settings while all the action happened around you.
To help photographers who are looking to shoot their first wedding, here are my top 5 tips for shooting a church wedding ceremony.

1) Be aware of photography restrictions
“Your camera isn’t one of those ‘clicky’ ones is it…?”
Some officials just don’t like photographers. Maybe they had a bad experience with an intrusive photographer in the past—possibly a friend of the wedding party with an expensive camera that offered to shoot it for free, but they just did not know what they were doing…
They can sometimes request that the photographer only takes shots from certain places and at certain times during the ceremony and after.
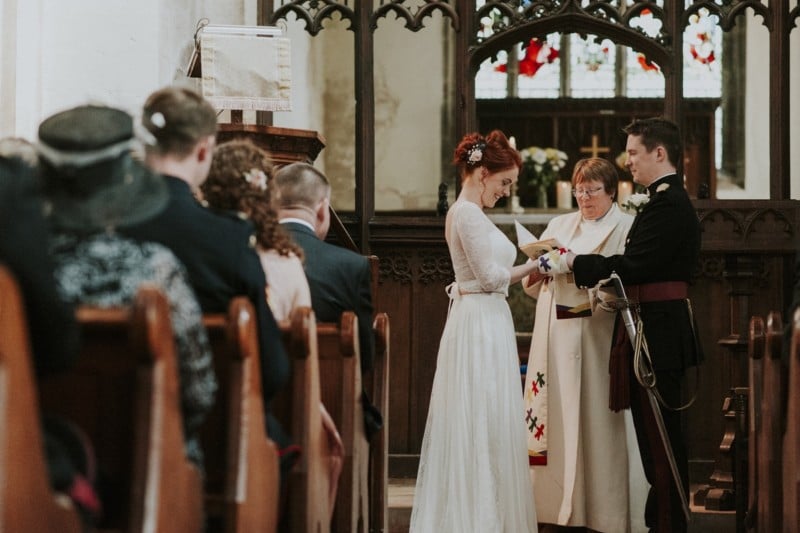
One official told me that she was concerned that the noise of the camera would detract from the solemnity of the occasion. As such, I was asked not to take pictures at all during the ceremony because she believed it would be distracting for the bride and groom.
I talked to the bride about this and she told the vicar that she personally had no problem with this—after all she had hired a photographer precisely to take photos during the ceremony. So, the problem was solved with a bit of good communication and the bride and groom got what they asked for.
My top tip for photographers: be respectful, but make sure your bride and groom are happy with the arrangements.

2) Attend the wedding rehearsal
Obviously, you will have checked out the venue before the big day to do some basic planning (assessing lighting conditions, seeing what the space is like). But how about attending the wedding rehearsal?
Here you’ll to find out things like exactly when and where key people will be making an entrance/exit, and where the band or choir will be. This will allow you to plan how you will frame key shots in the least intrusive way possible, and it will also make you aware of where your view will likely be restricted by guests or equipment. I sometimes go as far as sketching a map so I can visualize the service in the run-up—I find that it helps with my creativity on the day.
Also, attending the rehearsal is a great way to introduce yourself to family members and guests before the wedding. I find that this approach really helps family feel more comfortable day-of when I’m working around them, because the proverbial “ice” has been broken.
Chief of all is to make an introduction to the ushers and best man: they are vital to ensuring the day runs smoothly, especially where group shots are concerned.
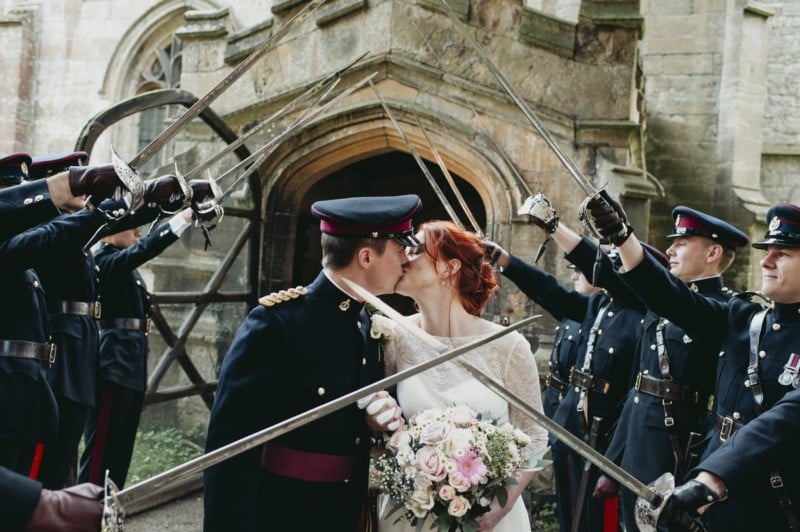
If you can’t attend the rehearsal, at the very least ask for the order of service in advance. Just keep in mind that not everything will be in the order of service. For example, when I did my first military wedding, I would not have been prepared to capture the military salute just before the ceremony if I hadn’t gone to the rehearsal.

3) If you are not early you are late
Make sure that you arrive at the church in plenty of time. You don’t want to be getting there just moments before the bride—mega stressful.
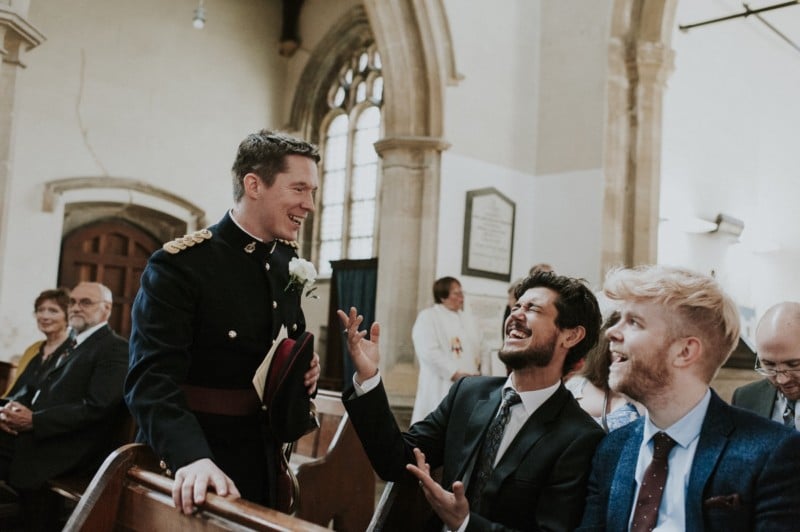
Arrive early so that you give yourself time to re-assess the lighting and mentally prepare to capture the most important parts of the whole day. If you pay attention to Tips #1 and #2, everything will be cool. Also, arriving early will allow you to capture candids of guests arriving and of the groom as he anxiously awaits his bride.
4) Don’t Be Afraid to Use High ISO
It’s more important to get the shot than have the ‘perfect’ shot (if there is such a thing).
Being unobtrusive is the name of the game, so flash is usually a no-no. Some photographers do use a bit of flash because it’s part of their look/style, but reference Tip #1 before you make that call.
In a church, you have to shoot where you can get a clear shot, and that may not always be where the best light is. To remedy this, push the ISO of your full-frame DSLR to an acceptable limit.
You’ll inevitably loose some dynamic range—colours and skin tones might not be reproduced as accurately as they are under ideal conditions—but at least you can work at exposures that are short enough to eliminate camera shake and reduce subject motion. During a ceremony, I won’t go lower than 1/250 of a second. Your client probably will not perceive a slight reduction in image quality vs. shots taken in better light, but they will notice if all of your ISO 100 shots are blurry.
Clients don’t pixel peep, and they certainly don’t view photographs from a technical level like a photographer-they’ll evaluate your shots at an emotional level. If the moment is there, and it’s been captured well, they’ll love it. And ultimately that’s what wedding photography is all about: capturing all of the most important moments.
If you miss the moment because you didn’t get your settings right, or if the shot is blurry… let’s just say you don’t want to be that photographer.
Bonus tip: When working at high ISO you can afford to underexpose by one stop or so in order to bump the shutter speed up and get a sharp shot. That said, I wouldn’t advise underexposing by more than this, because you don’t have as much latitude to perform big increases in exposure in post (at high ISO, colours can go a bit whack!). Make sure you meter correctly and try to get it right in camera as much as you can.

5) Work in manual mode
I use Aperture Priority with Auto ISO when the pace can be frantic and the lighting conditions are changing constantly (which is most of the wedding day). However, for the ceremony, I go full manual. I don’t want to rely on my camera to set what it ‘thinks’ is the correct exposure, I want to expose correctly, which is particularly crucial at high ISO (see Tip #4).
This is all part of the art of photography—you need to be able to visualize how your camera will interpret a scene and make constant minor adjustments on the go. This ability comes with experience. I like to be in full control during the ceremony because it’s such an important part of the day. Going manual also forces you to slow down a touch too and concentrate on your framing.
Finally, this will also save you heaps of time in post-production, because you will end up with a series of shots from a particular scene that have a consistent exposure, allowing you to batch process.
Bonus tip: Remember when shooting in full manual to drop your ISO on the way out of the church … I’ve been caught out by that one before.

About the author: Nathan Walker is a Nottingham-based wedding photographer, family man, and lover of smiles, coffee and adventure. To see more of his work, visit his website or give him a follow on Instagram. This post was also published here.


